Tools Needed When Making a Dining Table

IIt’s no secret: Dining sets are quite costly. If you want to transform your dining area without spending a fortune, you might be thinking of creating the table yourself. But for that, you’ll need an array of power tools and materials.
Even though you have room to customize the design of your table, each project will require the following:
- Legs cut to equal sizes
- Rounded or finished edges
- A smooth, level surface
We’re going to cover the tools you need to buy before starting your project and explain their importance:
Measuring Tools
As you know, with any woodworking project, measurements need to be exact. If one table leg is longer than another, the entire table will wobble whenever you use it.
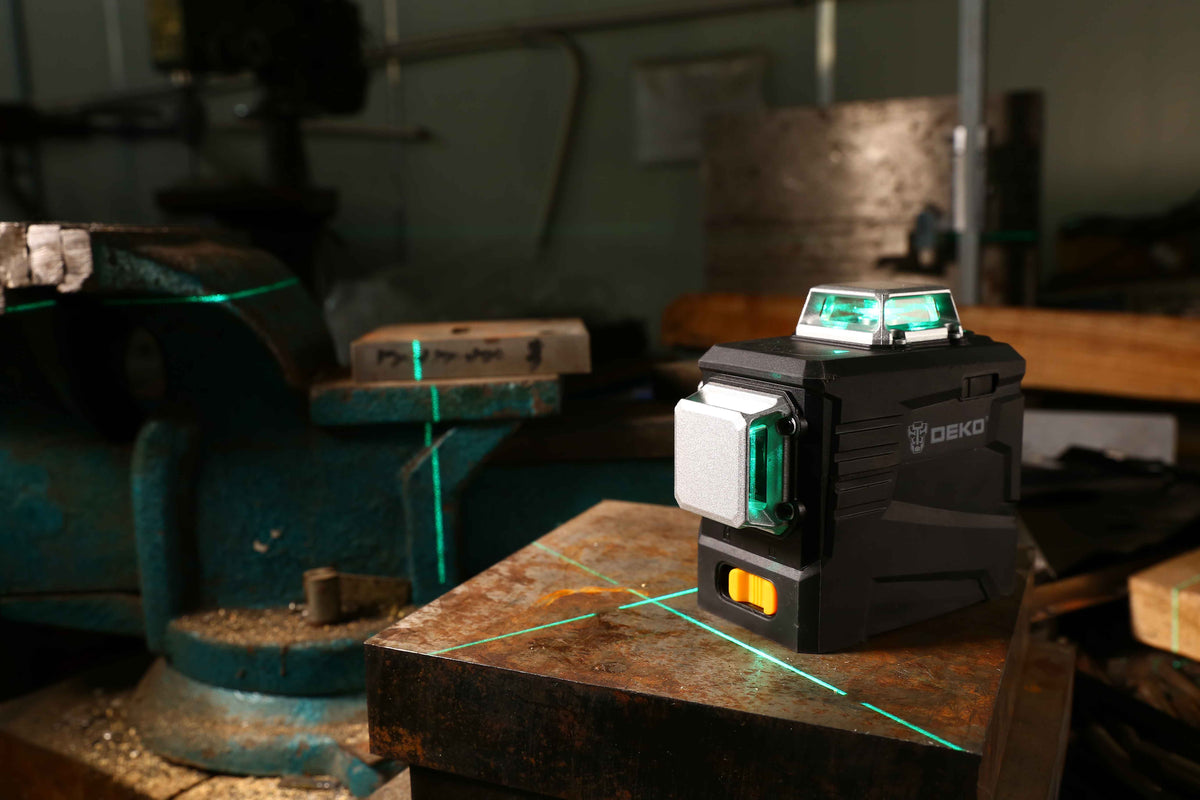
Try using a laser level to make measurements as precise as possible. With the 3D Green Laser Level 360 Outdoor Self Leveling Line Laser (DKLL12PB1), you can see precisely how accurate and level your cuts are. The bright green light allows you to see in sunlight or darkness.


Saws
You’ve chosen a type of wood and bought the lumber—now, it’s time to cut the material to size. The owner of KJP Select Hardwoods writes, “When you use high-quality power tools, you can create a unique table that will last for years to come.”
There are plenty of saws to choose from; for this project, we’ve broken them down into two main types:


Circular Saw.
This is the tool you’ll use to cut the lumber. Depending on how thick the material is, you’ll need a circular saw with enough motor power to cut through it.
We recommend the 1600W Circular Saw (DKCS1600). This product features a laser level, adjustable bevel, and ultra-precise cutting for a splinter-free finish. You can even use this saw to make angled cuts. It includes a built-in dust extractor, which keeps sawdust away from the cutting surface.
Jig Saw.
Looking for a saw that can handle even the densest pieces of wood? With a jig saw, you can cut through thick materials with ease, and you won’t need to sand as much after. They can even cut through metal.
With a jig saw, you can add decorative features to your table that you couldn’t otherwise with a regular saw. Add curved edges to your table for a refined, smooth look. You can create a round table that seats the whole family. Try adding bevel cuts to make the edges of your table unique.
Looking for a jig saw? Try the 1000W Variable Speed Jig Saw (DKJS80Z6). It combines precision with precise cutting power. Using the tilting base, it’s easy to make beveled cuts.
Drill
What’s a table without legs? To attach each piece, you’ll need to use a drill and bits. A cordless drill will save you the hassle of dealing with tangles and snags.
Free up your workspace with the DEKO Woodworking Household 20V Cordless Drill (DKBL20DU3). It plunges through thick pieces of lumber with ease. Use it to fasten screws within a piece of wood. Assembling your table with this drill will ensure a secure fit. With a long-lasting battery and LED illuminating light, you can easily attach each leg to the surface.


Sanding & Polishing Tools
When you think of a dining table, you think of a smooth, glossy, and level surface. If your dining table isn’t smooth, cups and bowls might be unstable.
To do that, you’ll need to sand and polish the table to perfection. If you’ve had to sand something by hand before, you know how tiring and time-consuming this process is. Instead, try using a sanding machine.
The 350W Electric Random Orbit Sander Palm Circular Sander (DKSD125J1) fits in the palm of your hand. It will glide across a wood surface with ease to create a smooth, even finish. With this tool, you can reduce the time it takes to sand and get better results.


Odds & Ends
Need a few extra accessories to get the job done? Looking for a convenient way to store your tools? Try the All-Purpose Household Tool Kit with Essential Tools 100-Piece. It includes useful accessories like a storage case, utility knife, and screwdriver. Once you’re finished building your table, you can use this convenient tool kit to repair any problems that may arise.
Assembling Your Dining Table
You’ve gathered all the tools and materials you need to build your table. Now, it’s time to roll up your sleeves and get started.
To assemble your table, you’ll need to put together a few things:
- Four table legs
- A base, where the legs attach to the surface of the table
- The tabletop

Here’s a quick step-by-step rundown on how to do it:
- Use your measuring tools to determine the proper length and width of each table leg, along with the surface and base of the table. If you’re trying to decide how big to make your table, consider how many people you want it to seat (2, 4, or 6).
- With your circular saw, begin to cut each table leg to size. Trim the legs if necessary to ensure each one is even.
- Once you’ve cut the table surface to your desired dimensions, you can add decorative features or rounded edges using a jigsaw.
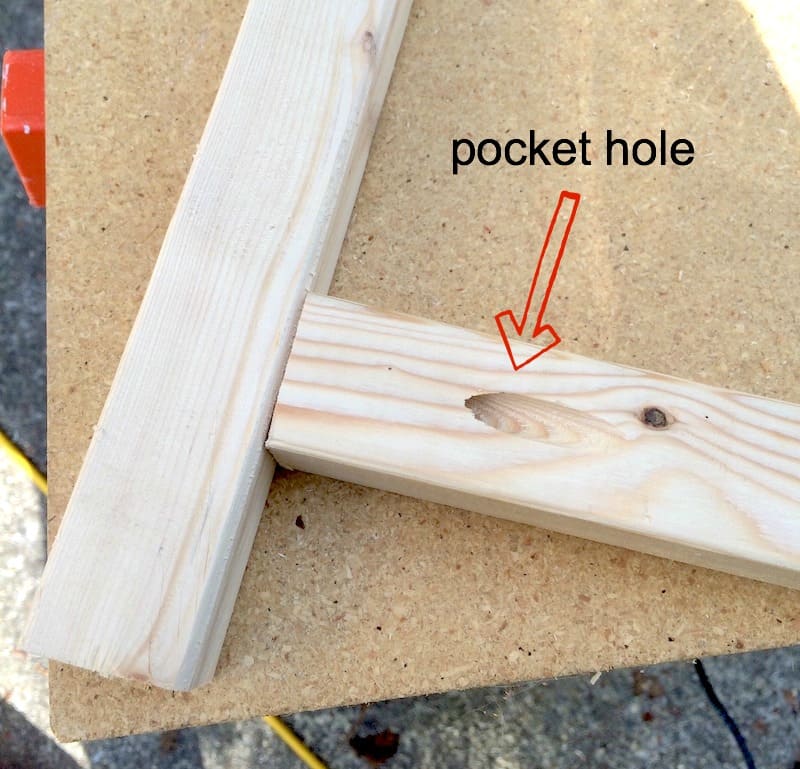
- Now it’s time to attach the legs to the base of the table. You can do so using pocket hole joints. With your drill, insert the pocket screws from the top of the leg into the corner of the table. Alternatively, you can attach the pieces using wood glue.
- Once everything is assembled, all that’s left to do is finish the wood. Use your sander to create a level, even surface.
- If you’d like, you can apply a wood stain to change the tone of the table. Finally, complete the project by applying a food-safe wood finish.


pocket hole joints
And Voilà! Your dining table is complete. All it’s missing is a delicious meal to serve on it. Then, you can sit down and enjoy the fruits of your labour.
Now that you’ve assembled your toolset and familiarized yourself with the process, you’re ready to start building. We hope this guide helps you get started on your next woodworking project.
Links of tools needed
Authors Bio
Kayla Russell is a part of the marketing team at KJP Select Hardwoods, your Canadian source for wood and woodworking products. KJP offers a diverse selection of products; their inventory features over 80 species of wood, including domestic and exotic hardwoods.


